
Most of what we post on Instagram is a before and an after. The photos are the easy part. What they leave out is what we found once we opened the job up, and why we fixed it the way we did.
So we're starting to write that part down. One post a month, each one from jobs we've actually done, in plain words. If it helps you work out whether something at your place needs attention now or can wait, it has done its job.
For this first one we went back through our notes from five recent jobs. The same idea runs through all of them: what makes a repair last is usually the part nobody sees once it's finished.
A window sill that had swollen and split
The sill had been damaged by moisture over time. The timber had swelled and split under the paint.
It's tempting to fill the cracks and paint over them. Once timber gets to that point, filling and painting only lasts a few months before the cracks come back through.
So the sill came out. We removed it without damaging the architraves or the plaster around it, then cut a new timber sill to suit the opening and scribed it in around the frame. The joints were filled and sanded smooth, and the sill was primed and given two coats to match the existing joinery.
A small job, but one that keeps the timber protected for years to come.
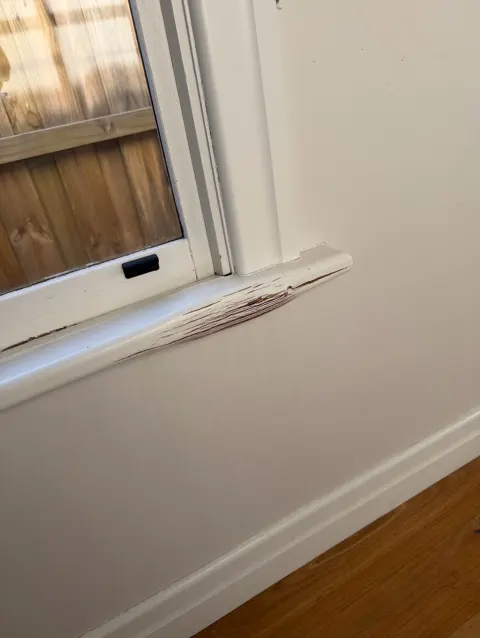
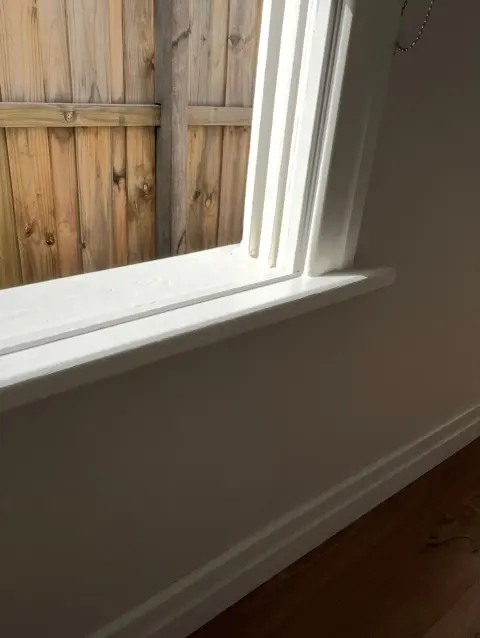
See all four photos of this job
Weatherboards that paint could no longer save
On this wall the boards had reached the end of their life. The signs were all there: flaking paint, split and cupped boards, and gaps opening up between the laps.
Once boards get to that stage, painting over them won't fix it, and they start letting moisture into the wall frame behind.
We stripped the failing boards off and checked the frame, then installed new weatherboards course by course, keeping the laps consistent and the lines running true along the full length. Joints were staggered, nail holes filled, and the boards primed ready for paint.
We did the same on a house in Richmond: rotten boards out, new timber in, an undercoat, two coats of paint, and every end filled.
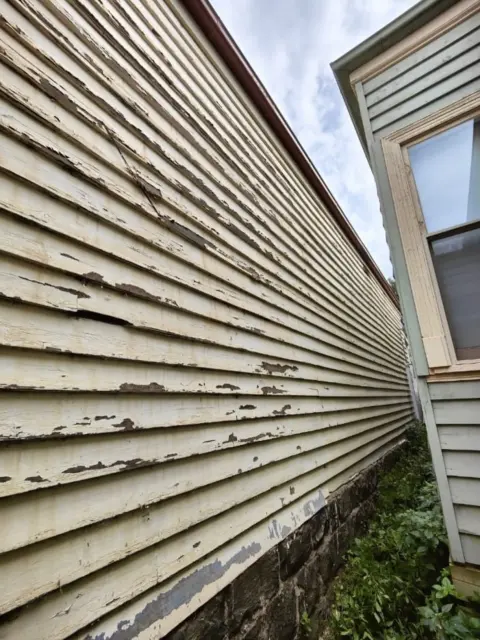
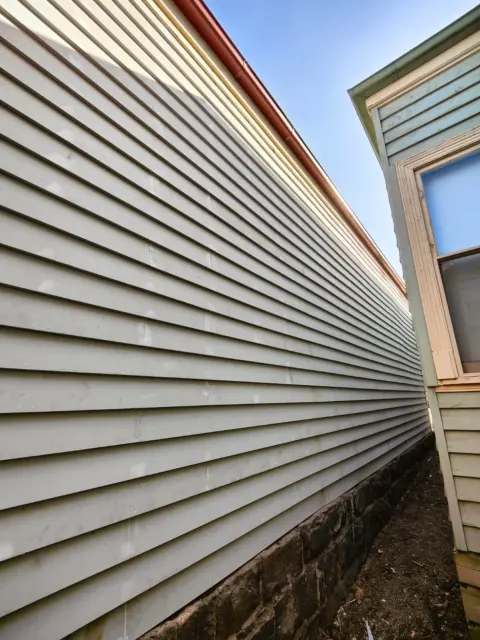
Photos of this wall, and the Richmond job
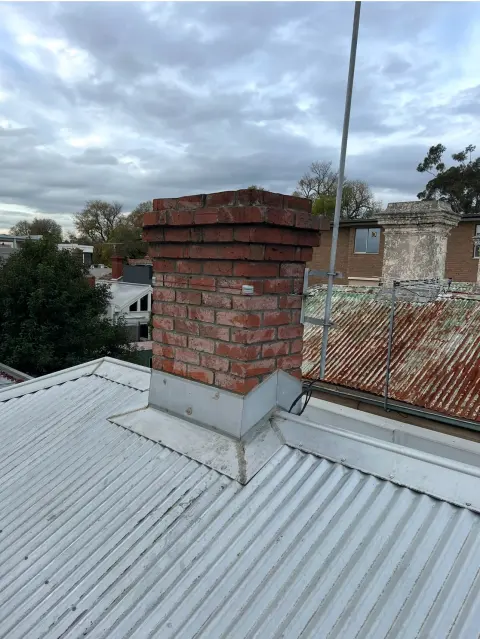
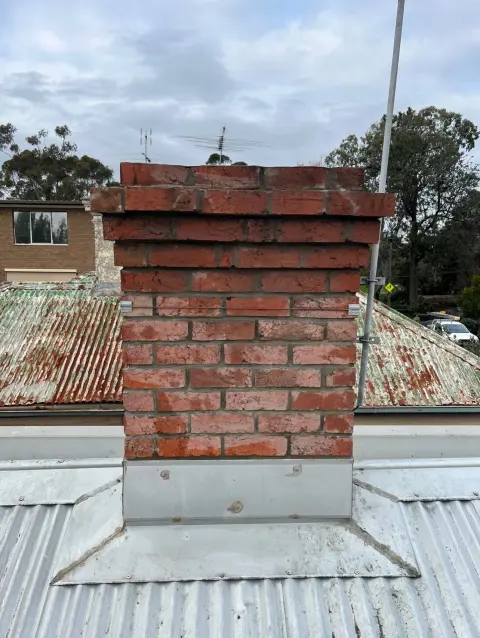
Chimney mortar that had gone soft
The mortar on this chimney had weathered back and gone soft in places. That is usually the first sign of moisture getting into the brickwork. Left alone, it leads to loose bricks, leaks and a much bigger repair bill.
We raked out the failing joints and repointed with a mortar mix matched to the existing colour and strength, then finished the joints so they shed water properly.
A fence stands or falls at its posts
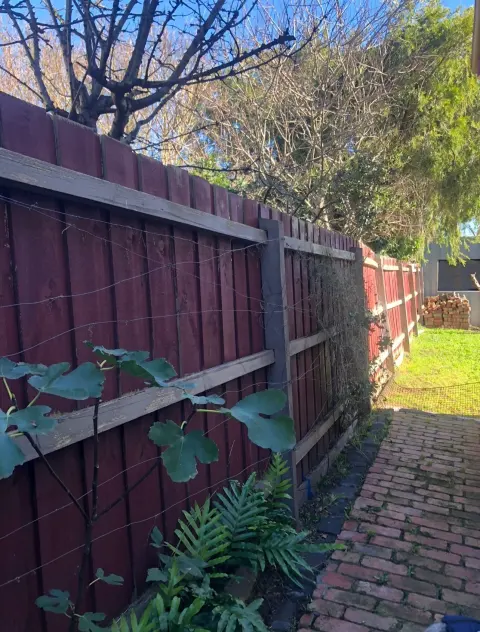
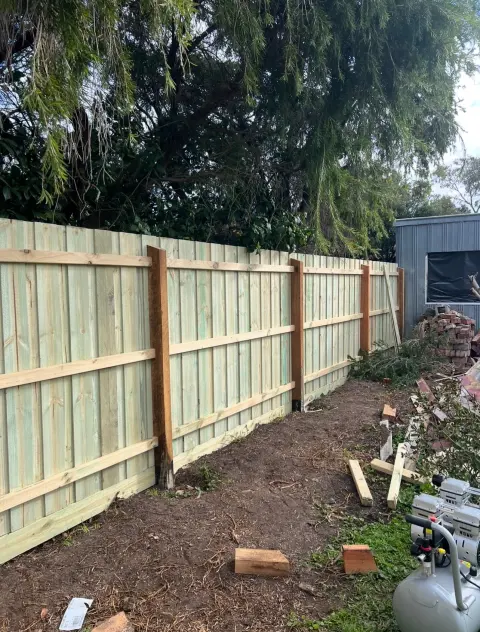
This was 37 metres of new timber fencing. The old fence was removed and taken away, and the line was set out with a string line so the full run stays straight.
Most fences that fail do so at the posts, so that's where we take our time. Each hole was dug to depth. Each post was concreted in, checked for plumb and left to set before any rails went on. The rails were then fixed level, following the natural fall of the ground where needed, and the palings spaced and fixed evenly.
Get the setout and the footings right and the fence stays straight and solid for years.
See all four photos of this fence
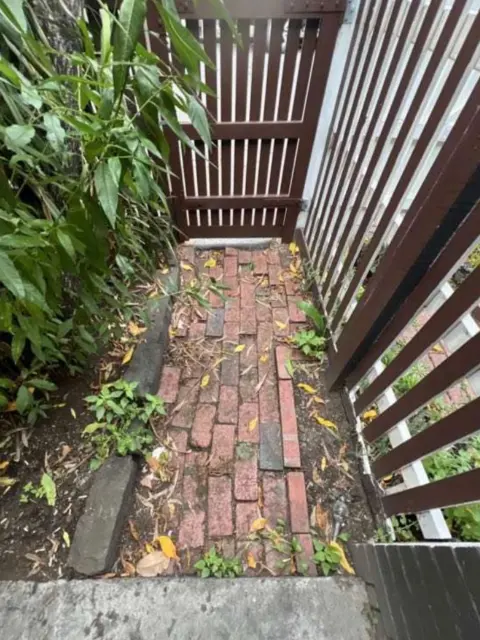
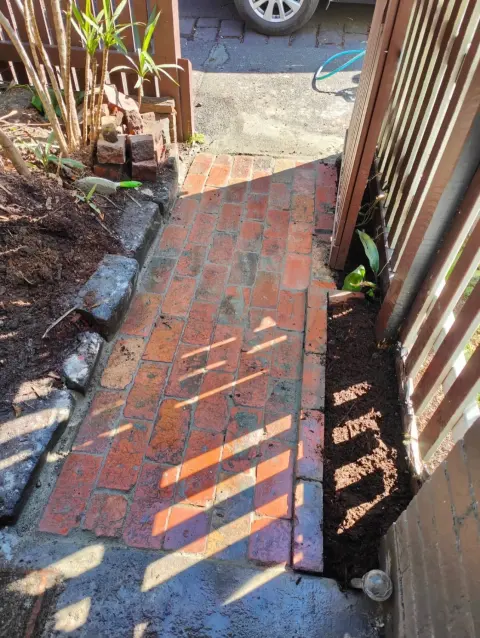
A brick path that had lifted and sunk
This path had lifted in some places and sunk in others, with loose bricks, open joints and weeds pushing through. It was uneven and a trip hazard.
We lifted every brick by hand and set them aside, dug out the old bedding and prepared a firm, level base so the path won't sink again. The original bricks went back in their running pattern, with a solid edge along the side to hold everything in place and the joints filled to lock it together and keep the weeds out.
Reusing the original bricks keeps the character of the property. The bluestone edging stayed where it was.
What to look for at your place
- A window sill where the timber has swollen or split under the paint.
- Weatherboards with flaking paint, splits or cupping, or gaps opening between the laps.
- Mortar that has weathered back or gone soft, on a chimney or anywhere else in the brickwork.
- Fence posts. That's where most fences fail.
- Bricks in a path that have lifted, sunk or come loose, with weeds coming through the joints.
If you've spotted one of these and aren't sure whether it needs doing now, send us a photo. A rough description and a photo or two is plenty to start with, and quotes are free.
This kind of work sits under our handyman and maintenance, painting and fencing services.